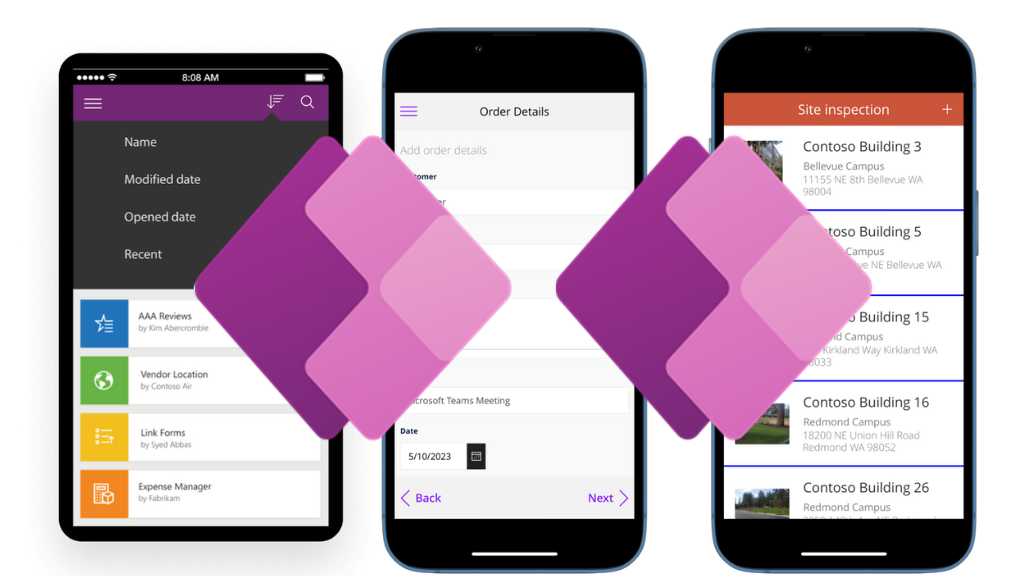
In application development, Microsoft Power Apps has made a name for itself as a robust service that allows developers to design applications easily. However, as technology improves, the demand to optimize these applications for mobile devices increases, ensuring accessibility and usability. Enter wrap for Power Apps, which Microsoft built for this exact use. It’s a tool that bridges the gap between Power Apps and the vast mobile user base.
Wrap allows developers to convert their Power Apps creations into iOS, Windows, or Android applications and facilitates the distribution of these apps on mainstream platforms like Play Store and App Store. This paves the way for broader outreach and flexibility in deploying business solutions.
In this article, you’ll learn how to transform your Power App into a mobile application. You’ll also explore certain Power Apps limitations.
Create a Mobile App with Power Apps
In this section, you will convert a Power Apps application into a mobile app using the wrap tool. This will enable you to expand your applications’ reach to Android and iOS platforms.
Prerequisites
The first thing you need is a Power Apps application. If you haven’t created one yet, you can start by following this beginner-friendly Power Apps tutorial to build your first app.
The goal is to ensure you have a functional app to work with. Once the Power Apps application is up and running, you’ll need need to set up a few other basic things before you can use the wrap feature to publish a canvas app as a mobile app:
– Access to one or more canvas apps for the wrap project
– Access to the Power Platform admin center for installing the wrap feature
– Access to the Azure portal for app registration
– Access to Microsoft App Center
– Apple Developer Program account
– Mac, necessary for the code-signing process of iOS applications
– For testing the wrapped mobile app, have the following mobile software versions:
– Android device operating on version 10 or above
– Apple device running iOS 14 or above
– For newcomers trying out wrap for the first time, refer to this guide to understand its usage and features clearly.
Installing the Wrap Feature in Power Apps
To install the Wrap feature via the Power Platform admin center, follow these steps:
Within the Power Apps dashboard, click the settings icon on your top right and click **Admin center**.

Click **Resources** then **Dynamic 365 apps**.

In the search bar, type “wrap”. Click on the option **Wrap for Power Apps**, which appears as a checkmark. Next, you want to click **Install**, which appears in your top left corner.

You should now find the feature **Enabled** under the **Status** section.

Wrapping Power Apps for Mobile Compatibility
In this section, you’ll learn to use the wrap feature, which is essential for transforming Power Apps applications into mobile-friendly versions. You’ll learn how to package and prepare any canvas app for a seamless transition onto mobile devices.
Select the canvas app you want to convert into a mobile app and click the **Wrap** icon on the toolbar. Ensure your app is part of a solution. This step lets you choose which canvas app you want to convert into a mobile app.

Click **Next** in the window that follows. You also have the option to add a secondary app. Usually, you’ll need to add this option if your primary app points to the secondary app. Here, you’ll work with a primary app; hence, there is no need for a secondary option.

Choose your target platform (Android or iOS). You must also add the bundle ID of your choice. While you can choose any name, this identifier must be consistent across different platforms and services, such as in app registration in Azure. You can pick any name as long as it follows a reverse domain name pattern. For instance, a good naming convention is `com.companyname.appname`.
To code sign your mobile app automatically, turn on the **Sign my app** toggle, choose the Azure key vault URI from the list, and click **Next**. If you don’t see any entries in the Azure key vault URI list, you will need to create an Azure key vault first.
You also have the option to manually code sign your mobile app package instead of using the automatic code-signing feature in the wrap wizard.

See how to code sign your app manually on iOS and Google Play Store. You can find the code-signing steps for Android in the next section.
Next, customize your app branding with icons, images, and color palettes to personalize your mobile app. This step allows you to create a unique look and feel for your mobile app that aligns with your organization’s branding. Please follow the guidelines on icon size for Android and iOS.

In this step, you need to register your app in Azure by using an existing app registration. It allows users to sign in to your app by creating a trust relationship between your application and the Microsoft identity platform. Once you’re registered, ensure that the details under **Azure API Connections** match what you have in Azure.

You have the option to create a new app registration manually. For more information on how to do this, you can visit the Azure portal and follow the registration process.
The wrap wizard automatically sets up all the necessary API permissions for your app. However, if you encounter any issues, you can also manually configure the API permissions.
On the **Manage output** screen, you can designate an existing App Center destination for your mobile app post-build or create a new one. To automatically create a new location, click **New Location** at the top of the screen and choose Android or iOS. For an existing application, click on **Get App Center token** to generate the authentication token. If you’re signed in to the same browser as your App Center account, you should automatically get the code generated into a new browser window. Copy and paste the token. Next, choose your App Center org and your Android App Center (which allows you to decide where to store your mobile app).

After you complete the steps on the **Wrap up** screen, review the app’s details and click the **Build** option.
*(Before building your app, please check that all details are as you want them.)*
This step allows you to create native mobile versions of your canvas apps as custom-branded Android and iOS mobile apps. Once the build process is successful, you can view your mobile app in the App Center location you had chosen in step six above.

In the next section, you will learn how to sign your app on Android and distribute it to your users.
Code Signing a Mobile Application (Android)
Code signing in Power Apps refers to digitally signing and verifying code within your Power Apps solutions. This security mechanism helps ensure that the code running in your Power Apps environment has not been tampered with and users can trust it.
Code signing is essential in dealing with custom connectors, custom controls, or components in Power Apps because it helps protect your apps and data from potential security threats.
In this section, you’ll sign your app for Android if you chose Android as the platform while creating and building your wrap project.
To get started, you’ll need to have Android Studio and OpenSSL installed.
Next, follow this guide to generate keys and signature hash. These keys and signature hash support authentication and verification purposes within the app.
Once you have the keys and signature hash ready, you must sign the APK package. You’ll use the apksigner tool available in Android Studio. This utility enables you to apply digital signatures to APKs and guarantees that the APK package’s signatures are successfully authenticated on all Android platforms compatible with the APKs.
Think of the `apksigner` tool as a stamping machine for your APKs. It adds a unique digital signature to each APK, similar to how a physical stamp is placed on a document to verify its authenticity.
To find your apksigner in Android Studio on Windows, use this path as `C:\Users\%USERNAME%\AppData\Local\Android\Sdk\build-tools\%VERSION NUMBER%\apksigner.bat`. Please note the version number might differ depending on which Android Studio app you have installed.

With this out of the way, you can sign your app.
Head over to the App Center to download your APK application file. Typically, you’ll get two files once you check your app releases. You want to select the APK file and click **Download**.

Copy the location file path of your apksigner tool. Next, open the command prompt as an admin and `cd` into this file path.

Execute the following command to use the apksigner and apply the signature to the package, where `ks` is the path to the keystore and `ks-key-alias` is the key alias path to APK file: `apksigner.bat sign –ks PATH_TO_KEYSTORE –ks-key-alias KEY_ALIAS PATH_TO_APK`.
When you’re prompted, enter the password.
![]()
Once you have signed your app, you can distribute it.
App Distribution
You can distribute a digitally signed mobile package as your custom-branded iOS and Android app through native distribution platforms such as the following:
This step allows your end users to access and use the mobile app.
Limitations of Power Apps
While Power Apps is an impressive platform and provides many advantages like rapid application development, integration with other Microsoft services, and a relatively low learning curve, it has some limitations:
* Power Apps restricts data queries to five hundred records per call, impeding performance past two thousand records, which could cause a transition to native development for scalability.
* Rapid development in Power Apps might compromise app smoothness and efficiency, especially with heavy tasks or big data.
* The customization scope is limited as Power Apps is a Microsoft-owned proprietary platform. Again, your app’s longevity and operation depend on Microsoft’s continued support and infrastructure, subject to their system changes.
* Power Apps–built apps are not shareable outside the originating organization due to licensing and technical constraints.
* Despite good integration with many services, Power Apps might only support some external business tools, potentially causing workarounds.
* As your user base or need for advanced features grows, so can the costs associated with Power Apps because of its licensing model.
Creating a Mobile App vs. Wrapping a Web App
Power Apps enables quick web app packaging within a mobile shell, which is helpful for rapid, cross-platform development. However, for a superior user experience, native apps are the recommended route because of several key advantages:
* Native apps are inherently faster and smoother as they’re optimized for specific platforms.
* Native apps offer full access to device capabilities like cameras, GPS, and notifications, unlike Power Apps, with more limited integration.
* Native apps can offer a more seamless and intuitive user interface, with better control over animations, gestures, and responsive design. Power Apps, while versatile, might not match the level of control and finesse achievable in a fully native app.
* Native apps can often work offline easily, whereas Power Apps may require additional configurations and might not provide the same offline capabilities.
* Native apps deliver a more cohesive user experience designed specifically for the platform they run on, ensuring seamless operation.
While Power Apps can help you quickly create mobile applications, the result is a web app packaged in a portable wrapper. However, if your goal is to deliver an exceptional user experience and fully harness the capabilities of mobile devices, you should consider investing in native app development.
In that context, Jigx is a robust native app development offering broader capabilities within the Microsoft environment. Catering to diverse mobile app development requirements, Jigx supports applications that can be consumer-, business-, and industry-specific, offering tools for various app types. Its scalability extends from small departmental projects to full enterprise applications, boasting advanced features such as security and compliance.
Beyond internal deployment, Jigx excels in developing apps for external customers and partners, fostering both internal and external user engagement. Moreover, Jigx proficiently handles complex workflows, facilitating the design of apps that align seamlessly with detailed organizational processes.
Conclusion
As you’ve seen above, using Power Apps to create mobile applications has advantages and limitations. It offers a rapid development environment and seamless integration within the Microsoft ecosystem, making it a valuable choice for various app development needs. However, it’s crucial to acknowledge that when creating native mobile apps with exceptional user experiences, there’s more to consider.
Jigx is a compelling alternative that goes beyond the confines of wrapping web apps within a mobile shell. With Jigx, you can tap into the full potential of the Microsoft stack, accommodating diverse app types, departmental or enterprise-level needs, internal and external user bases, complex workflows, and multiple data sources.
Whichever path you choose, whether the agility of Power Apps or the versatility of Jigx, rest assured that you have the tools at your disposal to bring your mobile app visions to life within the low-code-no-code tech ecosystem.